Fire & Gas Detector System Using Arduino Uno - Technoesolution
Description
Watch out the video If reading bores you.
If you got this article helpful, subscribe to our blog and our youtube channel for more interesting projects.
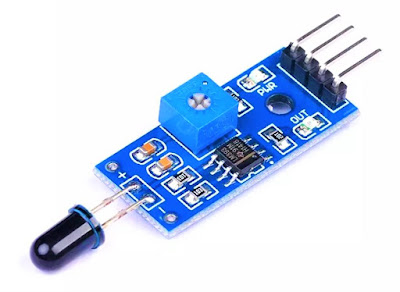
Fire Sensor:-
In the fire and gas detector system with protection using Arduino Uno project, we use Fire Sensor is mainly designed to detect fire/flame. There is an IR receiver LED is used on the sensor to detect fire. The IR receiver mainly detects radion emitted by the hot body or fire. The sensor has an onboard LED that turns on when the fire gets detected by the sensor. This sensor is very sensitive it detects fire very quickly. This sensor is widely used in fire detecting systems and in industrial areas to detect fire.
Feature of Fire Sensor:-
- Operating Voltage:- 3.3V - 5V DC
- Sensitivity:- High
- IC Used:- LM39*3
- Accuracy:- High
- Power Indicator is available
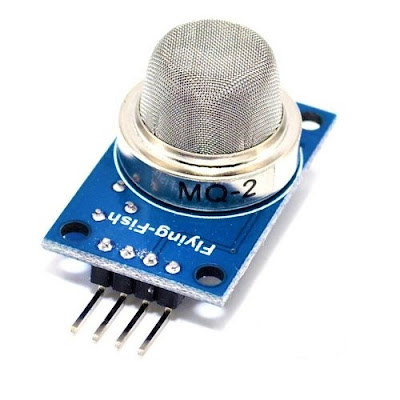
MQ-2 Gas Sensor:-
In the fire and gas detector system with protection using Arduino Uno project, we use an MQ-2 gas sensor is designed to detect flammable gases. This sensor detects Alcohol, Hydrogen, Propane, Methane, and LPG gas it also detects smoke. This sensor module comes with Analog and digital output pins. When gas gets detected by this sensor its analog output starts increasing and the digital output pin gets high.
There is the power LED and Indicator LED is placed on the sensor. When the sensor gets a power-up with a 5V supply the power led gets to turn on and when gas gets detected by the sensor the indicating led get's turned on until the gas gets removed from the sensor or respective area. This sensor is highly sensitive to LPG as well as alcohol and other gases. The MQ-2 gas sensor is compatible with Arduino and other microcontrollers.
Features of MQ-2 gas sensor:-
- Operating Voltage:- +5V DC
- Gas Detects:-
- Analog and Digital Output:-
- Sensitivity:- Combustible gases
- IC Used:- LM393
Material Required:-
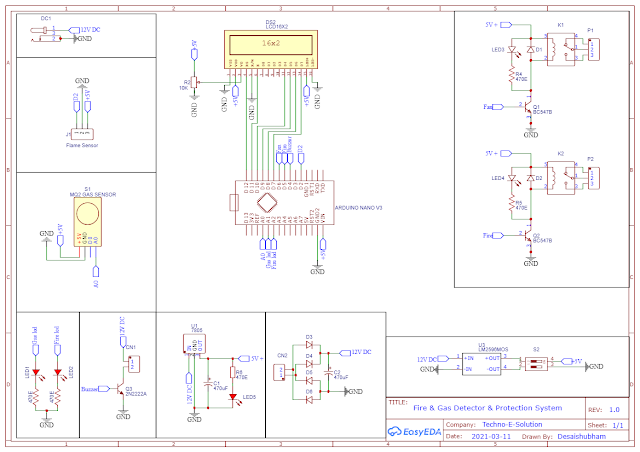
Circuit Diagram:-
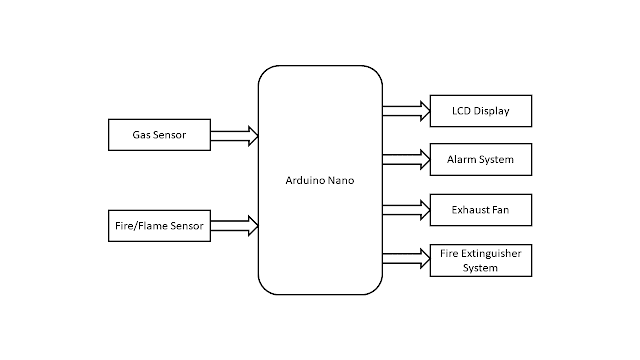
Block Diagram:-
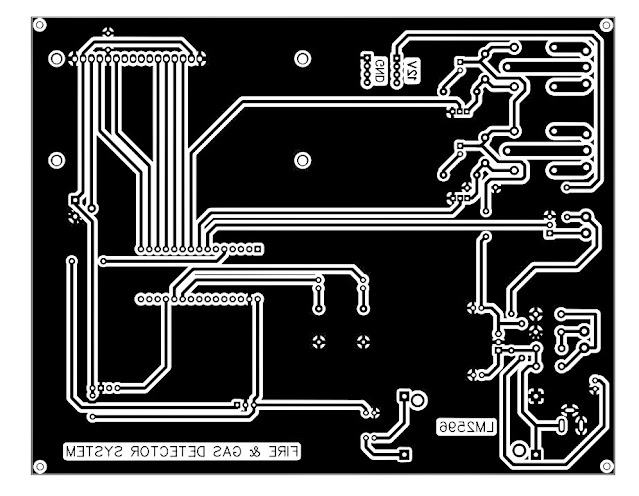
PCB Layout:-
I design a PCB layout in EasyEDA Software. I provide the PCB layout link just print the layout on glossy photo paper with 100% accuracy / Actual Size. To make PCB using the toner transfer method.
Top Silk Layer:- (Download)
Bottom Copper Layer:- (Download)
If you want to buy PCB from PCB manufacturers then go through NEXTPCB.
Gerber File:- (Download)
Tonner Transfer Method:-
To make PCB using toner transfer method, Refer to the following video to make PCB Using Toner transfer method.
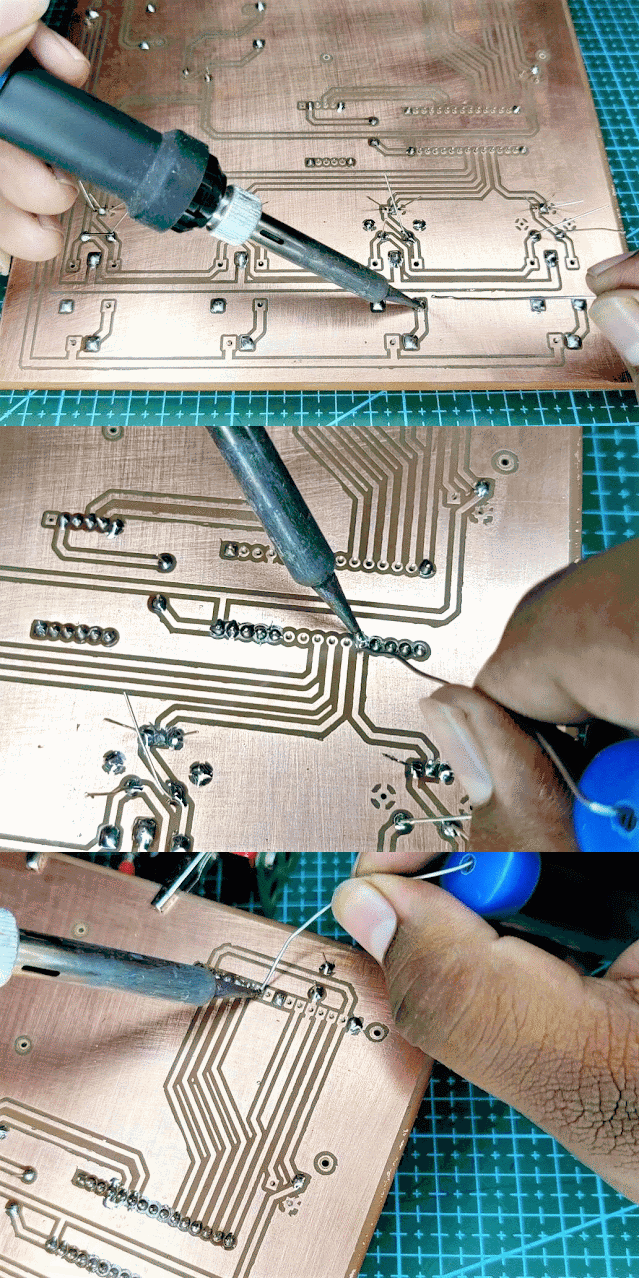
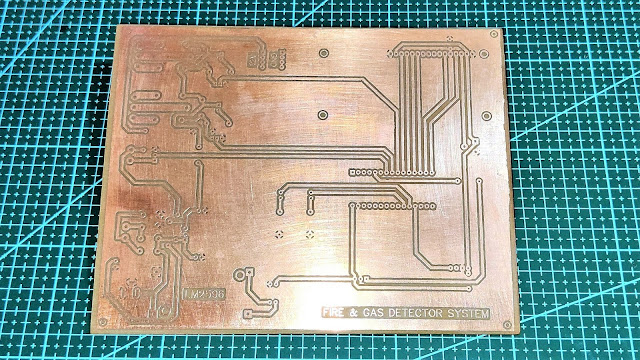
My PCB:-
After PCB Etching Process
Afte Soldering PCB
 |
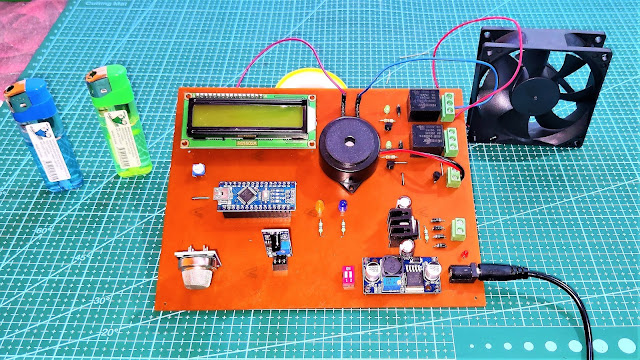
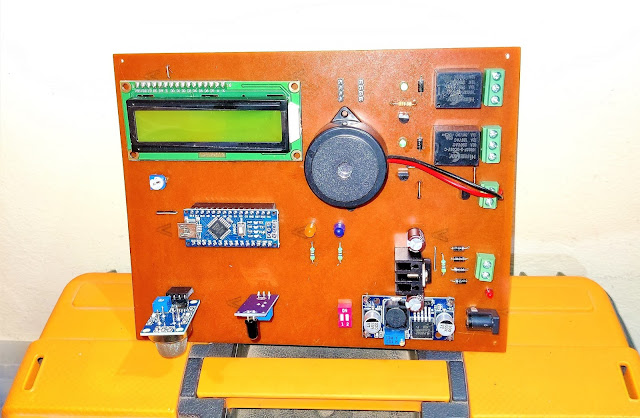
Complete PCB Setup:-
How It Works:-
In this project, I used an Arduino Nano as a microcontroller, We use two Sensors for this project which are the MQ-2 gas sensor and Flame Sensor. This sensor is used for two functions, To detect flammable LPG gas and to detect fire. On PCB I placed a 16x2 lcd display for demo purposes to show the live status of the system, If you placed this system in Kitchen then you can place this lcd display in the living room.
This Display Shows notification:-
- Name of the project [ Fire and Gas Detector System With Protection]
- Gas Detected/Exhaust system On:- When gas gets detected by the MQ-2 sensor
- Fire Detected/Extinguisher system On:- When the fire gets detected by Flame Sensor
- The system is stable:- When fire/gas is detected.
- I used on-board two Relays instead of a 2-channel relay module to control the Fire extinguisher and Exhaust fan system.
Working:-
- Whenever the flammable gas (LPG, Alcohol, Smoke) gets detected by the gas sensor the Exhaust fan system connected across the relay no 1 gets turned On until the gas gets completely removed from the room.
- Whenever the fire gets detected by the flame sensor the fire extinguisher system connected across it gets turned on until the fire gets completely extinguished.
- On PCB two LED indicators are connected which get turned on when fire/gas get detected by the sensor.
- The buzzer is used for alarm purposes when fire/gas gets detected the alarm started to ring.
Arduino Code:-
/*
 * Hello friends welcome back to "Techno-E-Solution"
 * Here is the complete Arduino Code Just Upload to the Arduino
 * Complete video tutorial:- https://youtu.be/Hfz3OumtENU
 */

#include<LiquidCrystal.h>
LiquidCrystal lcd(12,11,10,9,8,7);
int GasLED = A1;  // Gas LED
int Relay1 = 6;   // Exhaust Fan
int Relay2 = 5;   // Extinguisher System
int Buzzer = 4;
int MQ2Sensor = A0;  // MQ2 Sensor
int sensorValue = 0;
int FlameLED = A2;         // Flame LED
int FlameSensor = 2;     // Flame Sensor
int Flame = HIGH;        // Flame
//int REL = 11;
void setup() {
  pinMode(GasLED, OUTPUT);
  pinMode(Relay1, OUTPUT);
  pinMode(Relay2, OUTPUT );
  pinMode(Buzzer, OUTPUT );
  pinMode(MQ2Sensor, INPUT);
  pinMode(FlameLED, OUTPUT);
  pinMode(FlameSensor, INPUT);
  //pinMode(REL, OUTPUT);

  Serial.begin(9600);
  lcd.begin(16,2);
  delay (500);
    lcd.print("** SUBSTATION **");
    lcd.setCursor(0,1);
    lcd.print("...FIRE & GAS...");
  delay(2000);
    lcd.clear();
    lcd.print("DETECTOR SYSTEM");
    lcd.setCursor(0,1);
    lcd.print(" WITH PROTECTION");
  delay(2000);
    lcd.clear ();
}
void loop() {
  sensorValue = analogRead(MQ2Sensor);
  Serial.println(sensorValue);
   if (sensorValue > 300) {

    digitalWrite(GasLED, HIGH);
    digitalWrite(Relay1, HIGH);
    digitalWrite(Buzzer, HIGH);
    lcd.clear ();
    lcd.setCursor (0,0);
    lcd.print("GAS DETECTED");
    lcd.setCursor (0,1);
    lcd.print("EXHAUST FAN ON");
    delay (2000);

  }
  else
  {

    digitalWrite(GasLED, LOW);
    digitalWrite(Relay1, LOW);
    digitalWrite(Buzzer, LOW);
    lcd.clear ();
    lcd.setCursor (0,0);
    lcd.print ("SYSTEM IS STABLE");
  }
  delay (500);
  Flame = digitalRead(FlameSensor);
  if (Flame == LOW)
  {
    digitalWrite(FlameLED, HIGH);
    digitalWrite(Relay2, HIGH);
    digitalWrite (Buzzer, HIGH);
    lcd.clear ();
    lcd.setCursor (0,0);
    lcd.print ("FIRE DETECTED");
    lcd.setCursor (0,1);
    lcd.print ("EXTINGUISHER ON");
    delay (2000);

  }
  else
  {
    digitalWrite(FlameLED, LOW);
    digitalWrite(Relay2, LOW);
    digitalWrite (Buzzer, LOW);
    lcd.clear ();
    lcd.setCursor (0,0);
    lcd.print ("SYSTEM IS STABLE");
  }
  delay (500);
}
You can Buy me a coffee If you got this article helpful.


Post a Comment